
Tailgate parties are a highlight of sports season, but preparing snacks can be tricky. On my way to a recent football tailgate in Chicago, I packed homemade veggie sticks in a standard plastic container. After a bumpy 20-minute drive, the carrots and cucumbers were limp and soggy, and the hummus container had leaked all over my backpack and the party blanket.
A neighbor recommended I try a vacuum sealer with vacuum-seal bags and spill-proof dip containers. Now, my veggie sticks stay crisp, and dips never spill. This guide breaks down my prep, storage, and transport tips to make your tailgate snacks foolproof.
Why Choose Vacuum-Sealed Veggie Sticks for Tailgates
Tailgates are outdoors, snacks need to remain fresh, and portability is key. Vacuum-sealed vegetables outperform chips and processed snacks in taste, healthiness, and popularity.
1. Keep Fresh for Hours
Standard containers allow air in, softening veggies within an hour. Vacuum-sealed bags remove air and lock in moisture. Even after a 2-3 hour drive, my celery sticks stayed crisp for up to four hours.
2. Prevent Leaks and Mess
Vacuum-sealed bags trap natural vegetable water, protecting backpacks and party supplies. I no longer worry about soggy electronics or messy blankets.
3. Portion Control
Divide sticks into 2-3 person portions to avoid waste. At a recent tailgate for 12 people, six small bags were just enough with nothing leftover.
Vacuum-sealed veggie sticks paired with healthy dips are low-fat, satisfying, and crowd-pleasing, making them a great alternative to fried snacks.
Step-by-Step Guide: Preparing Vacuum-Sealed Veggie Sticks
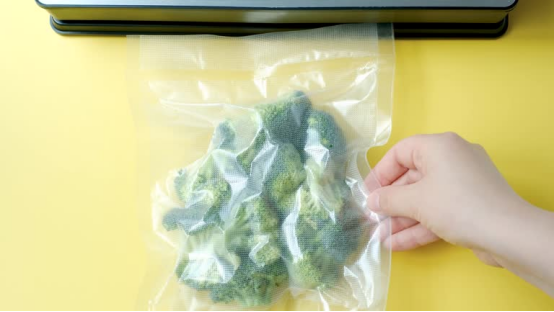
Step 1: Choose and Prep Vegetables
Select firm, medium-moisture vegetables for optimal crispness:
Carrots: Cut into 2-3 inch sticks, blanch for 10 seconds, then cool and pat dry.
Cucumbers: Remove seeds, cut into sticks, and blot surface water.
Celery: Trim leaves, cut into sticks, split thick pieces.
Bell Peppers (Red, Yellow): Remove seeds and ribs, cut 0.5-inch strips for color and visual appeal.
Broccoli Florets: Blanch 15 seconds, drain thoroughly to prevent excess moisture.
Ensuring vegetables are dry prevents water from compromising the vacuum seal.
Step 2: Use Your Vacuum Sealer Correctly
For this guide, I use a FoodSaver vacuum sealer, but similar steps apply to other models:
Place prepped vegetables in vacuum-seal bags, filling no more than two-thirds and leaving 1-2 inches at the top.
Smooth the bag opening and insert it into the sealer’s vacuum channel.
Activate the vacuum + seal function, which removes air and seals the bag in about 30 seconds.
Test the seal by gently tugging the bag; if any air leaks, trim the edge and reseal.
Handheld vacuum sealers are also effective for occasional small-batch prep, though suction is slightly weaker—ideal for low-moisture vegetables.
Step 3: Pair with Spill-Proof Dip Containers
Dips are essential but can spill easily. Follow these tips:
Choose silicone-sealed containers: Small glass jars with silicone gaskets prevent leaks. 3-4 oz containers are perfect for a single serving.
Add a buffer layer: For runnier dips like yogurt-based sauces, add a layer of oats or finely chopped nuts at the bottom. This stabilizes the dip and adds texture.
Keep cool: Prepare dips a day ahead, refrigerate, and transport in an insulated bag with ice packs to maintain freshness. Hummus or avocado dips stay stable even after 5 hours.
Popular dip choices include hummus, yogurt-mustard sauce, and guacamole.
Transporting and Displaying at Tailgates
Proper presentation makes a difference:
Transport: Place vacuum-sealed veggie bags and dips in an insulated cooler with 2-3 ice packs. Even at 85°F (29°C), veggies stay crisp for several hours.
Display: Cut a small opening in the vacuum-sealed bag to allow easy grabbing without contamination. Place dips in the center with small forks or spoons for convenience.
Presentation: Add decorative touches like cherry tomatoes or fresh herbs. A “rainbow platter” of bell peppers, carrots, and broccoli draws attention and makes photos share-worthy.
Avoid Common Vacuum-Sealing Mistakes
Skip watery vegetables: Tomatoes and lettuce release too much moisture, compromising the seal.
Do not overfill bags: Two-thirds full ensures a tight seal.
Check seals: Always inspect vacuumed bags for air leaks; reseal if necessary. One time, a bag of cucumbers leaked, and the vegetables were soggy by the tailgate.
Conclusion: Healthy, Stress-Free Tailgate Snacks
Vacuum-sealed veggie sticks paired with spill-proof dips solve freshness and portability challenges, offering a healthy and crowd-pleasing option. Prepare a day ahead, and you’ll impress friends while keeping your tailgate stress-free.
What are your favorite tailgate snacks? Have you tried vacuum-sealed vegetables for parties? Share your tips in the comments, and discover new ways to elevate your tailgate experience.