
After five years of baking and testing over 10 food preservation tools, I’ve seen it time and again: perfectly roasted walnuts turn rancid and bitter within weeks. The problem isn’t your roasting technique—it’s oxidation. Walnuts are rich in healthy unsaturated fats, but these fats react quickly with oxygen, especially after heat exposure. This guide will show you how a vacuum sealer can lock in freshness, extending the shelf life of your roasted walnuts by five times or more, using techniques honed from years of testing.
Why Roasted Walnuts Go Rancid So Quickly
The very nutrients that make walnuts delicious and healthy also make them fragile. When exposed to air, light, and heat, the oils in walnuts oxidize, leading to that unpleasant “off” flavor. Standard storage methods like zipper bags or glass jars leave too much oxygen inside, accelerating spoilage. Moisture is another enemy, as residual humidity from incomplete cooling can lead to mold and faster rancidity. A food vacuum sealer solves this by removing almost all the air from the storage bag, creating a near-zero-oxygen environment that halts the oxidation process at its source.
Step 1: The Perfect Roast—Setting the Stage for Sealing
A successful seal starts with proper preparation. For walnuts, this means achieving complete dryness and cooling.
- Dry Thoroughly: After rinsing, let walnuts air-dry for a couple of hours. Roast at 300°F (150°C) for 20-25 minutes, stirring halfway, until lightly golden and fragrant. The goal is to remove internal moisture without over-roasting and forcing the oils to the surface.
- Cool Completely: This is non-negotiable. Let walnuts cool completely on a rack for about an hour. Sealing them while warm traps steam, which creates condensation, leads to sogginess, and promotes bacterial growth.
Step 2: Sealing for Longevity—Choosing and Using Your Machine
This is where the right vacuum sealer machine makes all the difference. A good sealer doesn’t just remove air; it does so without crushing delicate foods.
Finding the Best Vacuum Sealer for Your Kitchen
We recommend three types based on your needs:
- For Most Home Bakers: A reliable dry/moist vacuum sealer is perfect. Look for a “Dry” setting specifically designed for nuts and other low-moisture foods. This setting uses a gentler suction to protect the walnuts’ shape while still removing air.
- For Batch Baking & Versatility: A 10-in-1 vacuum sealer with a long sealing bar and built-in bag cutter is ideal for processing large quantities efficiently. The ability to create custom bag sizes minimizes waste.
- For Small Spaces & Portability: A compact, lightweight vacuum sealer is great for occasional use or for taking on camping trips to preserve snacks. Ensure it still has a “Dry” setting for optimal results.
The 4-Step Sealing Process:
- Bag: Place cooled walnuts in a vacuum bag, leaving 2-3 inches at the top.
- Set: Select the “Dry” mode on your vacuum sealer.
- Seal: Place the bag’s open end in the machine, ensuring it lies flat. Start the cycle.
- Check: Once sealed, inspect the seam and ensure the bag is taut and air-free.
Real-World Results: Vacuum-Sealed vs. Traditional Storage
In a three-month test, the difference was dramatic:
- Vacuum-Sealed Walnuts: Remained crisp, fragrant, and flavorful—90% as fresh as the day they were roasted.
- Zipper Bag Stored: Developed a noticeable stale odor and lost crispness.
- Jar Stored: Showed signs of moisture and oxidation, with a bitter aftertaste.
Step 3: Smart Storage and Usage After Sealing
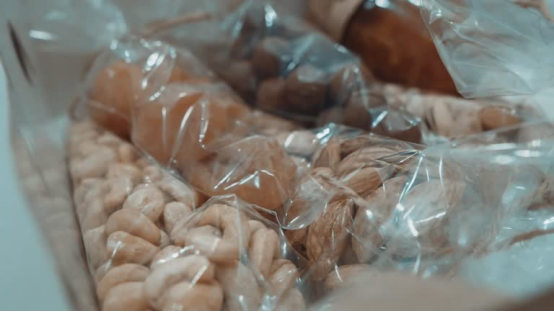
- Store Properly: Keep sealed bags in a cool, dark, and dry place like a pantry. For even longer storage (up to 8 months), place them in the refrigerator.
- Practice Smart Portioning: Seal walnuts in smaller, single-use portions. This prevents repeatedly exposing a large batch to air every time you need a handful for baking or snacking.
- Re-Seal if Needed: If you don’t finish a bag, use your sealer’s “Seal Only” function to close it again without vacuuming, minimizing air exposure.
3 Common Vacuum Sealing Mistakes to Avoid
- Sealing Before Cooling: Trapped steam is the #1 cause of failed preservation. Always let food reach room temperature first.
- Overfilling Bags: Leave enough space for the bag to seal properly. Crowded bags can lead to imperfect seals and air pockets.
- Using Damaged Bags: Inspect bags for tiny holes or weak spots before use. A compromised bag cannot hold a vacuum.
Conclusion: The Simple Key to Lasting Freshness
A vacuum sealer transforms food preservation from a guessing game into a reliable science. For prized ingredients like home-roasted walnuts, it’s the difference between enjoying them for weeks and savoring them for many months. By removing the air that causes spoilage, you protect the flavor, texture, and nutritional value of your food.
Ready to never waste a batch of roasted walnuts again? Explore our selection of easy-to-use, effective vacuum sealers perfect for bakers and home cooks. Find the model that fits your kitchen and start preserving your hard work today.