Keep Your Kid’s School Lunch Fresh: Vacuum-Sealed Apple Slices & Sandwiches Stay Crisp Until Noon

Every morning at 6:30 AM, I prepare my kid’s lunchbox, and the biggest challenge has always been keeping food fresh. I used to slice apples and soak them in lemon water, but by lunchtime, they’d turn brown and soft. Sandwiches, even when tightly wrapped, would absorb moisture from the fillings and become dry and crumbly. My child would come home saying, “Mom, lunch didn’t taste good.”
Three months ago, I started using a vacuum sealer, and it completely solved the problem. Now, my kid opens the lunchbox at school, and the apple slices are crisp, while the sandwiches are just as fresh as when I made them.
Why Ordinary Storage Methods Don’t Work
Before discovering vacuum sealing, I tried almost every tip online:
Sealed containers for apples: There’s still oxygen inside, which triggers enzymatic browning. Apples turn brown as polyphenol oxidase reacts with oxygen, affecting taste and reducing vitamins.
Plastic wrap for sandwiches: Moisture from bread and fillings seeps into each other, leaving bread soggy and lettuce wilted within hours.
Talking with other parents, I realized this is a common problem: food either oxidizes and loses flavor or loses moisture and texture, forcing us to pack less healthy, shelf-stable snacks. But we all want our kids to enjoy fresh fruit and sandwiches at lunchtime!
How a Vacuum Sealer Preserves Freshness
A vacuum sealer works differently from ordinary storage. Instead of just “sealing the bag,” it removes oxygen and creates a near-airless environment.
For apples: No oxygen means enzymatic browning is prevented.
For sandwiches: Moisture is preserved without unwanted migration, keeping bread fluffy and fillings crisp.
Example:
Last Tuesday, I sliced an apple into 5mm thick slices (thin enough to fit in a lunchbox, thick enough to avoid crushing), patted dry with paper towels, and placed them in a vacuum sealer bag. Using the “moist food” mode, the machine sealed the bag in 15 seconds.
At 12 PM, my child opened the lunchbox: the apple slices were bright, crisp, and juicy; the sandwich bread stayed fluffy, the ham was flavorful, and the lettuce was crunchy. My kid said, “This tastes 10 times better than before!”
Step-by-Step Guide for Parents: 3 Easy Steps to Vacuum-Seal Lunch
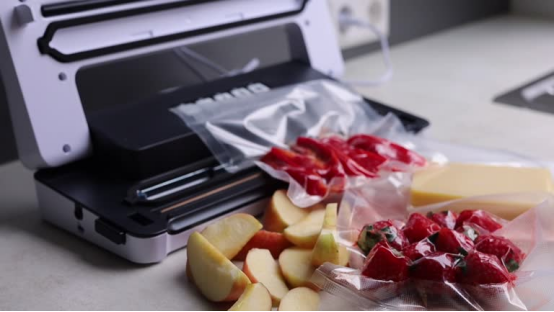
Many parents worry vacuum sealers are too complicated. In reality, it only takes 5 minutes in the morning.
Step 1: Prep the Ingredients
Fruit (apples, pears): Wash, core, and slice 4–6mm thick. Pat dry with paper towels to remove excess moisture, which can affect sealing.
Sandwiches: Keep whole (don’t cut) and place in a suitable vacuum bag (15cm x 20cm fits one child-sized sandwich). If containing juicy veggies like tomato or cucumber, layer a paper towel to absorb excess liquid.
Step 2: Select the Right Vacuum Mode
Moist food mode: For fruit, sandwiches, or rice balls. Preserves texture without sucking out natural moisture.
Dry food mode: For cookies, nuts, or dry snacks. Creates a stronger vacuum for longer shelf life.
Step 3: Seal and Check
After sealing, gently press the bag to check for leaks.
Avoid overfilling—leave at least 2cm between food and the sealing line.
Real-World Results After Three Months
Since March, I’ve been vacuum-sealing my kid’s lunchbox daily:
Apple slices: Sealed at 8 AM, eaten at noon—0% browning, 90% crispness retained. Far better than lemon water soak, which still showed ~30% browning by lunchtime.
Sandwiches: Bread stays soft for over 6 hours, lettuce remains crisp, and fillings retain flavor. My child finishes lunch every day.
Other foods: Corn on the cob, carrot sticks—still fresh, sweet, and crunchy, far easier than using storage containers.
Space-saving tip: I use a compact countertop vacuum sealer, smaller than a rice cooker, easy to store and clean. Perfect for small kitchens.
Tips & Advice for Parents
As a parent, keeping kids’ lunch fresh is a top priority. If you also struggle with lunchbox freshness, or want to explore vacuum sealing other foods like meat and vegetables, feel free to share tips in the comments.
If you want the exact model I use—simple, high-quality, perfect for parents—I can share its pros and cons to help you avoid mistakes and save time.