Thanksgiving Leftover Turkey Storage Guide: Keep Turkey Breast Fresh with Vacuum Sealing for Sandwiches and Soups

Last year, I roasted a 13-pound Thanksgiving turkey, and the biggest headache wasn’t cooking—it was dealing with the leftovers. I stored turkey breast in a plastic container in the fridge, but within three days it had a faint smell. When I froze it, the meat turned dry and stringy after thawing—sandwiches tasted like cardboard, and soups lost the rich turkey flavor.
This year, I finally tried using a vacuum sealer to portion and store the leftover turkey breast, and it was a game-changer. Weeks later, the meat still tasted fresh, juicy, and almost as good as it did straight out of the oven.
The Common Struggle with Thanksgiving Turkey Leftovers
Every household faces the same challenge: there’s always leftover turkey. Dense breast meat, flavorful drumsticks—too good to throw away, but hard to keep fresh. Over the years, I’ve tried three storage methods that failed:
Regular refrigeration: Even when wrapped in multiple layers of plastic wrap and stored in an airtight container, the turkey still oxidized. By day four, it had a stale fridge smell and turned from pink to dull brown.
Direct freezing: Tossing turkey straight into a freezer bag without prep led to ice crystals. When thawed, the meat leaked juices, lost texture, and turned tough.
Pre-mixed with sauces: I once tried coating turkey chunks in sauce before storage. The sauce’s saltiness penetrated the meat, overpowering the natural turkey flavor and limiting recipe options.
A neighbor suggested vacuum sealing: “I freeze mine for a month, and the turkey still tastes fresh in a sandwich.” I tried it this Thanksgiving—and it worked.
Why Vacuum Sealing Keeps Leftover Turkey Fresh Longer
Vacuum sealing isn’t just about sealing tightly. It tackles the root causes of spoilage and dryness:
Blocks oxygen to slow oxidation and bacteria growth: Oxygen exposure turns turkey meat brown and accelerates bacterial growth. By removing over 95% of air, a vacuum sealer creates a low-oxygen environment. Turkey lasts 3–4 extra days in the fridge and 1–2 months in the freezer.
Prevents freezer burn and locks in moisture: Ice crystals from conventional freezing puncture turkey fibers, causing dryness. Vacuum sealing protects moisture inside the meat and allows portioning into meal-sized bags—so you only thaw what you need.
Real result: I roasted my turkey on November 23, vacuum-sealed the breast on November 24, and by December 25, I used it in a Christmas turkey soup. The shredded meat stayed intact, juicy, and flavorful. My kids said, “It tastes even better than on Thanksgiving!”
Step-by-Step: How to Portion and Seal Turkey Breast in 3 Easy Steps
Even if you’re new in the kitchen, this process only takes about 10 minutes.
Step 1: Prepare the Turkey Breast – Debone and Cut by Recipe
First, remove the breast meat from the bone (bones can puncture vacuum bags). Then slice based on how you’ll use it:
For turkey sandwiches or wraps: Slice into thin 0.2-inch (0.5 cm) cuts—thick enough for texture, thin enough to bite easily. Trim off fat and tendons to avoid odors in storage.
For turkey soup or salad: Shred into 0.5-inch wide strips. They stay intact in soups and add bite to salads.
For turkey curry or fried rice: Dice into 0.4-inch (1 cm) cubes for even cooking.
Pat the turkey dry with paper towels—excess moisture can weaken seals and promote spoilage.
Step 2: Portion into Vacuum Bags
Use food-safe vacuum sealer bags (around 7×9 inches works well). Divide portions by meal size:
Sandwiches: 4–5 oz (about 120 g) per bag, enough for two sandwiches.
Soup portions: 5–6 oz (about 150 g) per bag, perfect for a pot of hearty soup.
Kids’ meals: 2–3 oz (50–80 g) per bag, quick to thaw with no waste.
Leave at least 1 inch (2–3 cm) of space above the meat so the seal is tight.
Step 3: Vacuum Seal Properly
Most home vacuum sealers have a “Dry” and “Moist” mode. Since cooked turkey is relatively dry, use the Dry setting:
Place the open end of the bag inside the vacuum channel.
Close the lid and press start—the sealer removes air and heat-seals the bag in about 20 seconds.
Check the seal: it should look smooth and airtight. If bubbles remain, reseal.
Refrigeration: Store at 32–39°F (0–4°C).
Freezing: Store at -0.4°F (-18°C) or below.
How Long Does Vacuum-Sealed Turkey Last?
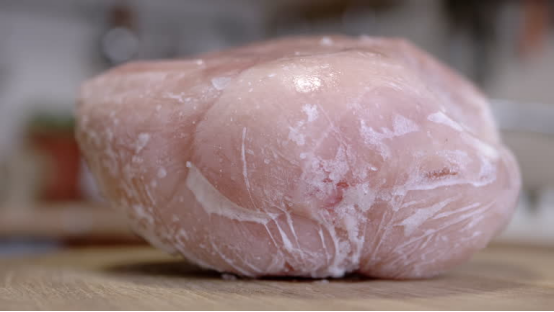
I tested different storage times to compare taste and texture:
Day 5 (refrigerated): Perfect for turkey sandwiches—meat stayed pink, juicy, and fresh.
Day 30 (frozen): Thawed overnight in the fridge and used in turkey corn chowder. The shredded meat absorbed flavors without falling apart.
Day 45 (frozen): Diced for a turkey salad. No freezer taste, firm texture—my family couldn’t tell it was leftovers.
Beyond Turkey Breast: Other Thanksgiving Leftovers to Vacuum Seal
A vacuum sealer isn’t just for turkey breast—you can keep other holiday dishes fresh too:
Turkey legs: Debone, cube, and seal for turkey curry or stew.
Roasted vegetables (carrots, squash, potatoes): Store in portions and reheat for sides without drying out.
Turkey stock: Pour cooled broth into vacuum bags, freeze flat, and save space. Perfect for soups or risottos later.
Final Thoughts: Make Leftovers as Good as Day One
I used to see Thanksgiving leftovers as a burden. Now, with vacuum sealing, they’ve become an opportunity. I save money, reduce waste, and enjoy turkey that tastes just as fresh weeks later.
If you’re tired of dry, flavorless leftovers, try vacuum sealing your turkey breast this holiday season. You’ll thank yourself when you pull out a perfectly juicy portion for a mid-December sandwich or a hearty January soup.