
Every Thanksgiving, cooking a big batch of stuffing often results in leftovers. Storing it in traditional containers can cause flavor transfer in the fridge, while freezing and reheating can make the stuffing dry or clumpy. Last year, I discovered that using a vacuum sealer completely changed how I store and reheat leftovers. It locks in freshness and maintains a fluffy texture when reheated. Here’s a practical guide for vacuum sealing your Thanksgiving stuffing and tips for choosing the best home vacuum sealer. Quality models and accessories are available at buyvacuumsealer.com/shop.
1. Why Vacuum Sealing Is a Game-Changer for Thanksgiving Stuffing
Thanksgiving stuffing usually contains meat, vegetables, and grains, which are prone to flavor transfer, moisture loss, or spoilage when refrigerated or frozen. A vacuum sealer solves these problems effectively:
Locks in freshness and prevents odor transfer: Vacuum sealing removes air and blocks smells from other foods. Last year, I vacuum-sealed corn and turkey stuffing in individual portions. Even after five days in the fridge, the stuffing tasted just like freshly made, without any fridge odors. Using traditional containers, leftovers would have absorbed other flavors in just two days.
Prevents clumping in the freezer and simplifies reheating: Portion the stuffing into single-serving sizes before sealing. Frozen vacuum-sealed bags don’t stick together, so you can microwave a single bag straight from the freezer in about two minutes. The texture remains fluffy and separate, unlike conventional freezing where the stuffing becomes a dense block.
Reduces waste and allows prep ahead of time: Vacuum-sealed stuffing can be made three days in advance, refrigerated, and reheated on Thanksgiving Day. Remaining portions can be frozen for sandwiches or stuffing patties later, minimizing waste and saving time.
Detailed comparisons of vacuum sealer models and user reviews are available at buyvacuumsealer.com/shop, helping you find the right home machine quickly.
2. Step-by-Step Vacuum Sealing for Stuffing: 3 Easy Steps
Vacuum sealing stuffing is straightforward with the right tools and a few simple tips. Using a home vacuum sealer and food-grade vacuum seal bags, you can prep leftovers in about 10 minutes:
Step 1: Cool and Portion to Avoid Moisture
Hot stuffing creates steam that can interfere with sealing. Let the stuffing cool to room temperature (about 30 minutes) before transferring into vacuum seal bags. Leave 1-2 inches of empty space at the top for proper sealing.
Step 2: Select the “Moist Food” Setting and Seal
Place the bag in the vacuum sealer slot and close the lid. Choose the “moist food” or “soft food” mode, which slows the vacuum process to prevent liquid from being sucked into the machine. Press start—the machine will vacuum and seal the bag in under a minute.
Step 3: Label and Store
Write the stuffing type and date (e.g., “Turkey Corn Stuffing 11/23”) on each bag. Refrigerate for 3-5 days or freeze for 1-2 months. For organization, store different stuffing varieties separately to avoid confusion.
For short-term storage and a more elegant presentation, you can use a Mason jar vacuum sealer. Stuffing fits directly into jars, which can be vacuum-sealed and served straight to the table.
3. Choosing the Right Vacuum Sealer: Two Best Options for Home Use
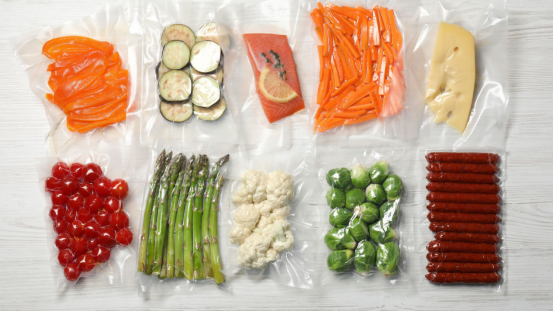
You don’t need a commercial-grade machine for Thanksgiving leftovers. Two types of home vacuum sealers are ideal:
Entry-Level Manual Press Vacuum Sealers: Affordable ($100-$200), compact, perfect for small amounts of stuffing. Only one bag can be sealed at a time, suitable for smaller households.
Advanced Automatic Vacuum Sealer Machines: Ideal for frequent meal prep or larger households. Supports moist/dry food modes and works with vacuum sealer rolls for customizable bag sizes. Can seal meats, bread, and other leftovers, providing multiple uses from a single device.
Always pair your machine with food-grade vacuum seal bags, preferably with puncture-resistant features, to avoid leaks from small particles like nuts or vegetable chunks.
4. Reheating and Creative Reuse: Enjoy Stuffing Beyond Thanksgiving
Vacuum-sealed stuffing makes reheating easy and opens up new meal options:
Direct Reheat: Microwave or steam directly from the fridge; frozen bags can be thawed in the refrigerator or steamed for 5 minutes. The stuffing remains moist and fluffy.
Creative Dishes: Make stuffing pancakes by mixing thawed stuffing with an egg and 2 tablespoons of flour, then pan-frying small patties for breakfast. Or create stuffing sandwiches by placing stuffing and a slice of cheese between bread slices and toasting for three minutes.
This year, I plan to vacuum seal three types of stuffing ahead of time, saving both effort and waste. Specific machines and accessories, including Thanksgiving bundles, are available at buyvacuumsealer.com/shop.
Conclusion
If leftover stuffing is a recurring challenge, vacuum sealing is the ultimate solution. It maintains freshness, simplifies reheating, and enables creative reuse while reducing waste. Whether you have a small family or a large holiday gathering, vacuum sealing ensures your Thanksgiving leftovers stay flavorful and ready to enjoy.
How do you handle Thanksgiving leftovers? Share your tips in the comments and let’s exchange practical food storage strategies.