
Traveling long distances often comes with challenges when it comes to enjoying fresh, hot meals. If you crave a tasty burrito on a road trip, train journey, or camping trip, you might face common issues: ingredients spoiling, complicated preparation, or inconvenient reheating. Takeout burritos often fall short in flavor, while pre-packed fillings can lose freshness due to crushing or oxidation. A vacuum sealer can solve all these problems: by sealing meat, vegetables, and sauces in airtight bags ahead of time, you extend freshness, reduce bulk, and simplify travel meal assembly. Once you reach your destination, a quick reheat and assembly is all it takes to enjoy a fresh, flavorful burrito. Check out a high-quality vacuum sealer here.
This guide covers three dimensions: the core value of vacuum sealing, proper filling preparation and sealing steps, and travel-friendly assembly techniques for burritos.
Why Vacuum Sealing Burrito Fillings Works
For long-distance trips—whether driving, camping, or high-speed train travel—meals need to be fresh, portable, and easy to handle. Vacuum sealing effectively addresses three main pain points of traditional DIY travel meals.
1. Extend Freshness and Prevent Spoilage
Burrito fillings like cooked beef, chicken, or chopped vegetables contain moisture and oils that can spoil within 4–6 hours at room temperature. Using a vacuum sealer dramatically extends shelf life:
How it works: The sealer removes air from the bag, creating an oxygen-free environment that slows bacterial growth and oxidation. Cooked meats sealed with a vacuum sealer can stay fresh for 12–24 hours at room temperature or 3–5 days refrigerated in a travel cooler. Vegetables like lettuce or bell peppers maintain color and crispness, avoiding water loss.
Data comparison: Unsealed fillings may lose up to 30% of their water content after 8 hours, whereas vacuum-sealed fillings retain over 95% of moisture, keeping flavor and texture almost identical to freshly prepared food.
Tool adaptation: Many home vacuum sealers, such as the one in our recommended link, support both wet and dry modes, making it easy to seal juicy meats, sauces, and crisp vegetables for burritos.
2. Reduce Volume for Easy Packing
Space is limited when traveling. Vacuum sealing compresses ingredients, making them easier to carry:
Compression effect: A 500 g batch of filling for 4 burritos shrinks from roughly 15×20×5 cm to 15×20×2 cm after sealing, fitting neatly in a backpack or luggage compartment.
Protection from crushing: Thick nylon vacuum bags resist punctures and pressure, keeping delicate ingredients like tomatoes or avocados intact.
Organized packing: Seal each component separately (meat, vegetables, sauces) to prevent flavor mixing and enable easy portioning during the trip.
3. Simplify Meal Assembly
With pre-prepared, vacuum-sealed fillings, you can assemble hot burritos in minutes, eliminating complicated preparation on the go:
No extra prep: Ingredients are washed, cooked, or chopped in advance and ready to use.
Easy reheating: Most vacuum-sealed bags are microwave-safe, allowing you to heat meat for 2 minutes, vegetables for 1 minute, and sauces briefly. If a microwave isn’t available, fillings can be quickly sautéed in a pan.
Step-by-Step Burrito Filling Vacuum Sealing
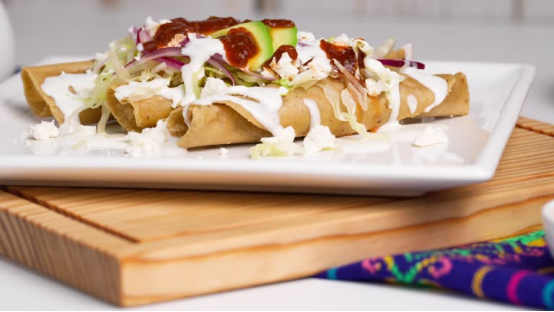
To ensure a smooth travel meal experience, prepare and seal fillings at home using your vacuum sealer.
Step 1: Prepare Ingredients by Type
Separate fillings according to cooking method and flavor to avoid mixing flavors during sealing:
Cooked meats: Season and cook beef, chicken, or other proteins, then cool to room temperature.
Vegetables: Wash, dry thoroughly, and chop. Use thicker slices or strips to avoid crushing.
Sauces: Place in small containers or silicone bags before vacuum sealing to prevent leakage.
Tortilla wraps: Wrap in plastic or place in a storage box to avoid damage; they don’t require vacuum sealing.
Step 2: Choose the Appropriate Vacuum Sealing Mode
Different fillings require different settings for optimal sealing:
Wet fillings (meats, sauces): Use “moist mode” to handle liquids without suction damage.
Dry fillings (vegetables): Use “dry mode” or gentle suction for delicate items.
Bag size: Match bag size to portion, sealing only what you’ll use at a time to minimize waste.
Step 3: Seal Properly
Proper use of a vacuum sealer ensures airtight packaging:
Lay the bag open and flat on the sealer’s heat strip, keeping contents away from the sealing edge.
Select the correct mode and start the sealing process (usually 10–15 seconds).
Inspect the seal for completeness. If needed, reseal using the machine’s “double seal” function.
Label each bag with the ingredient and date for easy identification during travel.
Assembling Burritos While Traveling
Once at your destination, assembling a fresh burrito takes just three steps:
Step 1: Reheat Fillings
Microwave: Puncture bags with small holes to release steam. Heat meat for 2 minutes, vegetables for 1 minute, and sauces briefly.
Stovetop / Campfire: Remove fillings from bags and heat gently, ensuring ingredients remain moist and flavorful.
Step 2: Layer for Best Texture
Spread sauces on the tortilla first to prevent sogginess.
Layer meat evenly, then add vegetables for crunch.
Optional: sprinkle cheese over meat to melt slightly.
Step 3: Wrap and Enjoy
Fold the sides, roll tightly from the bottom, and secure with foil if desired. Any leftover sealed fillings can be stored in a cooler and reused within 24 hours.
Choosing the Right Vacuum Sealer for Travel
A travel-friendly vacuum sealer should meet three criteria:
Compact and portable: Small footprint (<30 cm width, <2 kg) and dual power options (plug-in and rechargeable) for hotel or campsite use.
Versatile modes: Support for wet and dry ingredients, gentle suction for delicate vegetables, and anti-leak design for sauces.
Easy to clean and durable: removable heat strips, smooth surfaces, and sturdy materials like ABS plastic. Reusable thick nylon bags reduce waste on the road.
A high-quality vacuum sealer, like the multifunction model in our shop link, makes it simple to prepare and transport burrito fillings without sacrificing freshness or convenience.
Conclusion
For long-distance travel, the key to enjoying fresh, flavorful burritos is prepping and vacuum sealing your fillings in advance. A reliable vacuum sealer not only extends shelf life and reduces packing volume but also streamlines meal assembly, letting you enjoy hot, tasty meals anywhere. With just a little preparation at home, your burritos will stay fresh and delicious, even hundreds of miles away.