The Secret to Crisp Tailgate Party Salads: Separating Greens & Dressing with a Vacuum Sealer

Tailgate parties are all about easy, delicious food you can enjoy anywhere. But salads—the fresh, crunchy counterpoint to heavier grilled fare—often arrive limp, soggy, and disappointing after a car ride. The culprit? Traditional containers let air, moisture, and dressing wreak havoc on delicate greens during transit. The solution is surprisingly simple and doesn’t require a kitchen overhaul: a vacuum sealer. By vacuum-sealing salad greens and dressing in separate packs, you can transport a crisp, restaurant-fresh salad to any parking lot, field, or campsite. Here’s how this method works and how to execute it flawlessly for your next outdoor gathering.
The Tailgate Salad Problem: Why Regular Containers Fail
Three main challenges sabotage a salad’s journey from your kitchen to the tailgate:
- Wilted Greens: Cut lettuce, cucumbers, and tomatoes lose moisture rapidly when exposed to air, turning soft and limp within hours.
- Soggy, Discolored Salad: Premixed dressing oxidizes greens (like turning romaine yellow) and creates a soggy, unappetizing texture as it soaks in.
- Transport Leaks & Messes: Jostling during a car ride can pop open lids or cause spills, creating a sticky mess in your cooler or trunk.
A vacuum sealer solves all three by creating an airtight, moisture-locked environment. Separating the components—a technique we call the “dressing-on-the-side, perfected” method—ensures each element stays fresh and intact until you’re ready to assemble and eat. You can find the ideal tool for this job in our guide to portable vacuum sealers for outdoor meals.
The Science of Freshness: How a Vacuum Sealer Keeps Greens Crisp
A vacuum sealer preserves food by controlling the three factors that cause spoilage: air, moisture, and bacteria.
1. Removes Oxygen to Slow Oxidation: The sealer extracts over 95% of the air from the bag. Since oxygen causes cut vegetables to brown, wilt, and lose nutrients (a process called oxidation), removing it dramatically slows decay. Vacuum-sealed greens can stay crisp at room temperature for 4–6 hours—plenty of time for a tailgate.
2. Locks in Moisture to Prevent Wilt: The vacuum process creates a low-pressure environment that minimizes moisture evaporation from the vegetable cells. Even water-rich veggies like lettuce and bell peppers retain their crisp, plump texture, unlike in a standard container where they slowly dehydrate.
3. Inhibits Bacterial Growth: Many bacteria require oxygen to proliferate. By removing air, a vacuum sealer extends the safe window for consuming cut produce at ambient temperatures, giving you peace of mind when refrigeration isn’t available.
Keeping the dressing separate in its own vacuum-sealed pouch prevents it from prematurely breaking down the greens’ cell structure, doubling down on freshness.
Step-by-Step: Building Your Tailgate Salad with a Vacuum Sealer
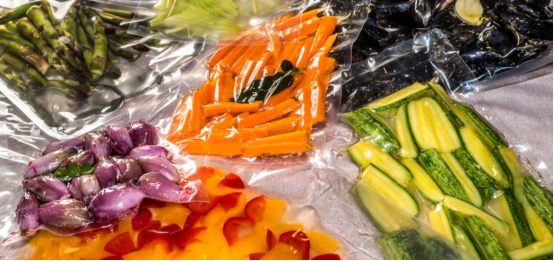
The entire process takes about 15 minutes and requires no special skills.
What You’ll Need:
- Greens: Choose sturdy, crisp varieties—romaine, iceberg, kale, cucumber, cherry tomatoes, bell peppers, shredded cabbage, or carrot sticks. Avoid delicate or easily oxidized items like avocado or sliced apples (for a fruit salad, these can be sealed separately with a splash of citrus).
- Dressing: Any vinaigrette, ranch, Caesar, or tahini dressing works. Opt for a medium viscosity; very thin dressings are more prone to seepage, even when sealed.
- Equipment: A home vacuum sealer (a compact, portable model is ideal) and food-grade vacuum sealer bags. Transparent, 8″ x 12″ bags are perfect for single or double servings.
The Process:
Step 1: Prep the Vegetables
Wash all greens and vegetables thoroughly. This is critical: excess surface water can interfere with the vacuum seal and promote bacterial growth. Dry everything completely using a salad spinner followed by patting with clean kitchen towels or paper towels. Tear lettuce by hand instead of cutting it with a knife—this creates fewer damaged cell edges, reducing moisture loss. Slice cucumbers, peppers, and carrots into sticks.
Step 2: Vacuum-Seal the Greens
Portion the dried greens and veggies into vacuum sealer bags. Don’t overfill; leave enough room for the bag to seal properly without crushing the contents. Place the open end in your vacuum sealer and run the cycle. You’ll see the bag tighten around the food as the air is removed, then hear the seal click shut. For extra delicate items like cherry tomatoes, use the “gentle” or “pulse” mode if your sealer has it.
Step 3: Vacuum-Seal the Dressing Separately
Pour your chosen dressing into a smaller vacuum sealer bag or a dedicated sauce pouch. Remove the air and seal it. This not only prevents leaks but also stops dressing odors from migrating to the greens.
Step 4: Pack for Transport
Place the sealed green bags and dressing pouch into your cooler or an insulated bag. In hot weather, add a couple of ice packs around them. The flat, rigid bags stack neatly and won’t leak, even on bumpy roads.
Step 5: Assemble at the Tailgate (1 Minute)
When you’re ready to eat, simply:
- Tear open the greens bag and empty it into a large serving bowl.
- Snip the corner of the dressing pouch and squeeze it evenly over the salad.
- Toss and serve immediately. You’ll have a vibrant, crisp salad that tastes just-made.
Pro Tips for Maximum Freshness & Convenience
- Choose a Portable Vacuum Sealer: For tailgating, a compact, cordless vacuum sealer is a game-changer. Models like the ones featured in our roundup of wireless vacuum sealers for on-the-go freshness are about the size of a large smartphone, can be charged in your car, and allow you to reseal snacks or leftovers right at the event.
- Use Thick, Food-Grade Bags: Always choose bags labeled “food-safe” or “BPA-free.” Opt for thicker bags (3 mil or greater) for tailgating—they’re more puncture-resistant and provide a better moisture barrier than thin bags.
- Prep Smarter for Longer Crispness: For leafy greens, tear, don’t cut. For carrots and celery, a quick 5-minute soak in ice water after cutting (followed by thorough drying) enhances crunch. Always ensure ingredients are completely dry before sealing.
Beyond Salad: Your Vacuum Sealer as the Ultimate Tailgate Assistant
Your vacuum sealer isn’t a one-trick pony. It’s the ultimate prep tool for hassle-free outdoor meals:
- Fresh Cut Fruit: Seal apple slices, strawberries, or melon to prevent browning and bruising.
- Pre-Made Sandwiches & Wraps: Keep bread from getting soggy and fillings fresh-tasting.
- Marinated Meats for Grilling: Pre-marinate and seal proteins; they’ll cook up more flavorful and tender.
- Snack Protection: Reseal opened chips, crackers, or nuts to prevent staleness and crushing.
Conclusion: Fresh, Effortless Tailgating Starts with a Vacuum Sealer
A vacuum sealer transforms the tailgate salad from a risky, often-soggy afterthought into a guaranteed crowd-pleaser. By locking out air and locking in moisture, it keeps greens garden-fresh for hours without refrigeration. The separate dressing pouch ensures every bite is crisp and perfectly coated.
This method embodies the true spirit of tailgating: great food, shared easily, with more time for fun and less time worrying about prep or cleanup. It’s a small upgrade to your routine that delivers outsized results.
Ready to make your next outdoor meal fresher and easier? Explore our selection of easy-to-use vacuum sealer kits for beginners to find the perfect model and bag combo for your tailgating adventures.