Camping Breakfast Made Easy: Vacuum-Sealed Oatmeal Packs for Stress-Free Mornings

As someone who camps in Yellowstone and the Great Smoky Mountains three to four times a year, I used to dread making breakfast at camp. Oats would get clumpy from moisture, milk would spill inside my backpack, and cooking while swatting mosquitoes was never fun.
Everything changed when I started using a food vacuum sealer to prep vacuum-sealed oatmeal packs at home. Now, breakfast is as easy as pouring hot water into a bag—five minutes later, I’m eating a warm, filling meal without dirtying a single pot.
This guide will walk you through why vacuum-sealed oatmeal packs are the ultimate camping breakfast hack, how to make them at home, and which vacuum sealing tools are best for your camping style.
Why Vacuum-Sealed Oatmeal Packs Are the Best Camping Breakfast Idea
According to the Outdoor Industry Association, over 60% of U.S. campers prefer “lightweight breakfasts.” Vacuum-sealed oatmeal bags check all the boxes:
Space-saving – reduces bulk by 40%, perfect for backpack side pockets.
Longer shelf life – oats and toppings stay fresh for 2–3 weeks, even in summer.
Quick prep – just add hot water, no stove or frying pan required.
Compared to bulky oatmeal cans or leaky milk cartons, vacuum packs are compact, mess-free, and ready in minutes—ideal for hikers who want extra sleep or need an early start.
Step 1: How to Make Vacuum-Sealed Oatmeal Packs at Home
It only takes about 20 minutes to prep 3–4 days’ worth of camping breakfasts. Here’s how:
1. Pick the Right Ingredients: Nutritious, Lightweight, Long-Lasting
Here are three tried-and-true combos that balance flavor, energy, and storage life:
Classic Nutty Mix – Instant oats (100g) + chopped almonds (20g) + raisins (15g) + brown sugar (5g).
High-Protein Mix – Instant oats (100g) + protein powder (20g) + freeze-dried strawberries (15g) + chia seeds (5g).
Sweet & Easy Kids Mix – Instant oats (100g) + cocoa powder (10g) + mini marshmallows (10g) + powdered milk (15g).
Avoid fresh fruit, liquid milk, or raw oats that require long cooking. Stick to instant or quick oats.
2. Choose the Right Vacuum Sealer and Bags
You don’t need commercial gear—a simple home food vacuum sealer does the job. Focus on:
Dry + Moist Mode – If adding nut butter or small amounts of paste, choose a sealer that handles liquids.
Bag Size – 8×12-inch vacuum seal bags for food are ideal. Ribbed or textured bags seal better and won’t warp when hot water is added.
3. Seal in Three Simple Steps
Fill bags – Leave 2–3 inches of space at the top for clean sealing.
Vacuum + seal – Place in your vacuum sealer machine, press start, and wait 10 seconds.
Label clearly – Write flavor and date on each bag (e.g., “Nut Mix – Sept 2025”).
Step 2: How to Eat at Camp – Hot Breakfast in 5 Minutes
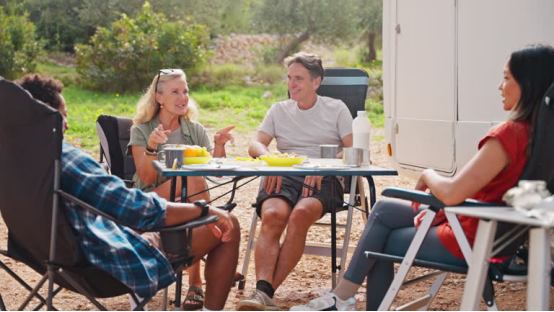
No pots, no cleanup—just follow these quick steps:
Add hot water – Ideally 185–200°F (85–95°C), enough to cover ingredients by an inch.
Seal + wait – Fold the top of the bag and let soak for 5 minutes while you pack gear or make coffee.
Eat safely – If the bag is too hot, wrap in a towel before opening. Adjust soaking time for preferred texture.
Step 3: More Camping Uses for a Food Vacuum Sealer
Your vacuum sealer isn’t just for oatmeal—it’s a versatile camping tool:
Pack other foods – Jerky, dehydrated veggies, or crackers stay fresh and compact.
Seal dirty clothes – Keep odor and dirt away from clean gear and sleeping bags.
Preserve leftovers – Half-eaten apples or sandwiches last an extra 1–2 days.
Choosing the Right Vacuum Sealer for Camping
Not all campers need the same gear. Here’s a quick breakdown:
Occasional Campers (1–2 trips/month, 1–2 people)
Best choice: Handheld vacuum sealer + small bags
Why: Lightweight, portable, affordable ($50–80).
Regular Campers (3–4 trips/month, 3–4 people)
Best choice: Countertop vacuum sealer (dry + moist mode) + medium bags
Why: Stronger seal, can prep larger batches, also useful for home kitchen.
Long Expeditions (1 week+, group trips)
Best choice: Commercial vacuum sealer + large bags
Why: Runs longer without overheating, seals 20–30 bags in one session.
Real Campers Share Their Experience
Mark from California – “Sealed oatmeal packs save backpack space, and my kids love the hot cocoa mix. No more soggy oats!”
Sarah from Colorado – “On long hikes, I need fast, filling breakfasts. Five minutes with hot water, and I’m ready to go.”
Mike from Alaska – “In winter, I keep the bag inside an insulated sleeve so the oats stay hot. Much easier than cooking in the cold.”
Final Thoughts: A Smarter Camping Breakfast
Camping should be about exploring the outdoors, not struggling with messy breakfasts. Vacuum-sealed oatmeal packs are lightweight, long-lasting, and quick—giving you more time to hike, relax, and enjoy nature.
If you’re looking for easy camping meals, vacuum seal bag ideas, or backpacking breakfast tips, this method is a game changer.
Next time you pack for a trip, try prepping vacuum-sealed oatmeal bags—you’ll never go back to cooking oatmeal the old way.