The Ultimate Meal Prep Hack: Keep Food Fresh for 3 Days with a Vacuum Sealer

As a busy American professional, “What’s for lunch?” used to be my biggest daily struggle. Takeout was greasy and overpriced, and cooking from scratch after work was the last thing I wanted to do. I tried meal prepping, but leftovers rarely tasted good after two days: Sunday’s roasted chicken breast turned dry by Wednesday, guacamole picked up every odor in the fridge, and pasta got mushy and bland.
That all changed six months ago when I bought a vacuum sealer for meal prep. Now, my midweek smoked salmon with quinoa is just as fresh as day one, and reheated cheesy sweet potatoes still pull into gooey strings. Vacuum sealing turned meal prep from a compromise into something I look forward to. Here’s my complete guide for making it work in an American kitchen.
Why Refrigeration Alone Fails Meal Prep (and How a Vacuum Sealer Fixes It)
I once thought my fridge was the problem. Then I read the USDA food safety guidelines and realized two major issues with traditional storage:
Oxidation: Oxygen in the air breaks down proteins (chicken gets dry, beef turns brown) and degrades vegetables (broccoli loses its green color).
Odor Transfer: Plastic containers don’t block smells—your oatmeal ends up tasting like bacon, and salads absorb garlic from the fridge.
A meal prep vacuum sealer solves both: it removes 95% of oxygen, slowing oxidation by up to 90%, and the airtight food-grade bags act like a shield against odor transfer. I tested it: two roast beef sandwiches, one in a container, one vacuum-sealed. After three days, the container sandwich was soggy and smelled of cheese. The sealed one? Crisp bread, juicy beef, and flavorful sauce—exactly how meal prep should taste.
4 Steps to Vacuum-Sealed Meal Prep That Actually Works
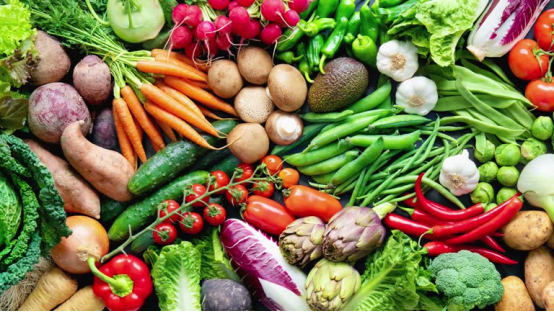
Many people give up on vacuum sealing because they don’t adjust for real U.S. food habits. Follow these four steps and your meals will stay fresh for at least three days.
1. Choose the Right Foods (and Avoid the Wrong Ones)
Best foods for vacuum food storage in the U.S.:
Proteins: Roasted chicken breast, smoked salmon, beef strips, cooked shrimp, bacon. I roast five chicken breasts every Sunday, season with rosemary and black pepper, seal them individually, and they’re ready for salads or wraps all week.
Carbs: Quinoa, brown rice, pasta, whole wheat bread, tortillas. Pasta in particular stays loose and firm, unlike the clumpy mess from plastic containers.
Prepared dishes: Guacamole, bolognese sauce, mashed potatoes, chopped veggies like carrots and bell peppers.
Avoid: raw meats (blood contaminates bags, USDA warns they’re unsafe after 2 days), watery veggies (lettuce, cucumbers), or mayo-based salads (risk of listeria).
2. Cool Before Sealing—Never Bag Hot Food
Sealing hot food traps steam, causing soggy textures and weak seals. Instead:
Let hot dishes (pasta, roasted potatoes) cool for 30 minutes in stainless steel pans or ceramic bowls before sealing.
Liquids like sauces should fill only ⅓ of the bag to prevent spillage into the machine.
3. Adjust Vacuum Strength for Each Food
Most U.S. vacuum sealers let you control suction strength. Match it to the food:
Soft foods (bread, cookies): light suction, keeps texture intact.
Firm foods (chicken, beef, veggies): medium suction, removes air without crushing.
Liquids/sauces: strong suction, but keep the bag upright to avoid leaks.
4. Reheat the Right Way
At the office (microwave): snip a corner of the bag for steam release, open partially, and microwave on medium-high for 1–2 minutes.
At home (oven or pan): baked potatoes reheat perfectly in a 350°F oven, while pasta revives in a skillet with a splash of water.
3-Day Taste Test: Vacuum Sealed vs. Plastic Container
| Food Item | After 3 Days Vacuum-Sealed | After 3 Days in Container |
| Roasted chicken | Juicy, tender, herb flavor intact | Dry, brown edges, fridge smell |
| Bolognese sauce | Thick, rich tomato flavor | Watery, dry meat, cheesy odor |
| Whole wheat bread | Fluffy, crisp edges | Soft, damp, bacon odor |
| Smoked salmon | Moist, mild, fresh | Dry, dark edges, onion odor |
| Quinoa | Loose, nutty, flavorful | Clumped, rough texture |
| Carrot & pepper mix | Crisp, sweet, colorful | Soft, faded, unpleasant smell |
The difference is night and day.
3 Pro Tips for American Meal Preppers
1. Portion Big-Packs from U.S. Grocery Stores
Most U.S. groceries sell proteins in bulk (1 lb. chicken packs, 2 lb. beef strips). Portion into single servings before sealing. USDA estimates this reduces household food waste by 30%.
2. Label Clearly with Dates
Always mark “Cook Date + Use By Date” with a marker. Example: 10/15 Roasted Chicken. This ensures food safety and avoids accidental spoilage.
3. Pair with Microwave-Safe Containers
Vacuum bags are great for storage, but reheating is easier if you transfer to aluminum trays or microwave-safe boxes. Perfect for quick office lunches.
Final Thoughts: Meal Prep Should Be Fresh, Not Forced
I used to think meal prep was just “eating leftovers.” But with a vacuum sealer for meal prep, it became the opposite: every lunch feels freshly made, healthier than greasy takeout, and cheaper than overpriced delivery.
In America’s fast-paced lifestyle, a vacuum sealer for food preservation is more than a gadget—it’s a way to save time, cut waste, and enjoy fresh, homemade meals all week.
If you’re tired of soggy leftovers, it might be time to upgrade your meal prep with a vacuum sealer. Trust me: it’s a small change that makes a big difference.