Costco Shopping Without Waste: 4 Food Categories You Should Vacuum Seal for Maximum Freshness

As a mom who makes weekly Costco runs, I used to struggle with the “big pack equals big waste” problem. I’d buy a 5-pound pack of beef sirloin, only to find it freezer-burned two weeks later. A 2-pound tub of rolled oats would turn clumpy in three weeks. Even frozen blueberries for my kids stuck together in one giant block, impossible to scoop out individually.
That all changed when I started using a vacuum sealer. By sealing food properly, I finally achieved what every American household dreams of—buying in bulk, saving money, and keeping food fresh without waste. Here’s a breakdown of four common Costco staples and how vacuum sealing can make them last longer, taste better, and save you hundreds of dollars a year.
1. Bulk Meats (Beef Sirloin, Chicken Breast, Bacon): Portion, Seal, and Freeze for 3 Months Freshness
Costco’s meat deals are unbeatable—3–5 pounds of beef sirloin or chicken breast are often 30% cheaper than the grocery store. But the downside? “Too much to finish, too fast to spoil.”
Before I owned a vacuum sealer, I wrapped meat in cling film. Within a month, white ice crystals formed, and cooking released so much water that the texture turned dry and chewy. Now, here’s my foolproof method:
Cut into Meal-Sized Portions
Beef sirloin: cut into 200g portions for two people.
Chicken breast: divide into 150g packs for single stir-fry use.
Bacon: seal 2 slices per pack for easy breakfasts.
Use Heavy-Duty Vacuum Bags
Costco sells heavy-duty vacuum bags (80μm thick) that prevent punctures. Thin bags tear easily when sharp bones or tendons press against them.
Vacuum + Seal Correctly
Place meat carefully to avoid the edges touching the seal strip. Use the machine’s “meat mode” if available, so suction is strong enough without crushing. Label with the date. I sealed beef sirloin in December and grilled it three months later—tender and flavorful, with zero freezer burn.
My neighbor Susan does the same with Costco bacon: “Before, it spoiled in a week. Now it stays fresh for two months. Breakfast tastes just like day one.”
2. Baking Essentials (Oats, Flour, Nuts): Keep Dry, Bug-Free, and Fresh for 4 Weeks
For American families who love baking, Costco’s 2-pound oats, 5-pound flour bags, and 1-pound mixed nuts are essentials. The problem? Once opened, they absorb moisture, clump, or even attract pantry moths.
Divide After Opening
Pour one week’s oats (about 200g) into a glass jar, then seal the rest into standard vacuum bags in two-week portions. Use the “gentle mode” to avoid crushing flakes. Stored in the pantry, oats stay fluffy for a full month.
Double-Seal Unopened Bulk Packs
Haven’t opened that 5-pound flour bag yet? Use your vacuum sealer’s external suction function. Attach the nozzle to the original package, seal it, then clip it shut. I did this last summer, and my flour stayed bug-free and airy for two months.
My friend Lisa followed this tip with Costco nuts: “They used to taste bitter after two weeks. Now, vacuum-sealed, they’re still crunchy after a month. My kids love them as snacks.”
3. Frozen Fruits & Veggies (Blueberries, Broccoli, Spinach): No Clumping, No Spoiling, Ready to Cook
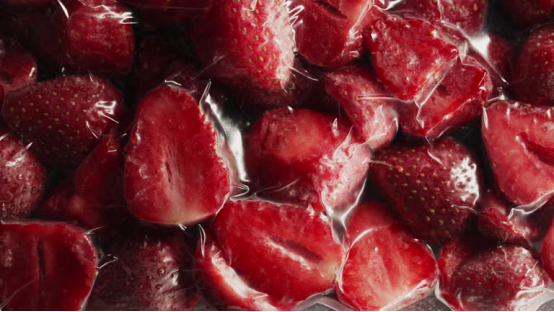
Costco frozen produce is a steal—3 pounds of blueberries for $8, half the price of fresh. But once frozen, they clump into a solid block, making it impossible to grab just a handful.
Here’s how I solved it:
Pre-Freeze Before Sealing
Spread fruit or veggies in a single layer on a baking tray. Freeze for 1 hour before vacuum sealing. This prevents sticking. Skip this step, and blueberries become mush.
Seal in Small Portions
Blueberries: 150g packs for one smoothie.
Broccoli: 200g packs for one stir-fry.
That way, you never defrost more than you need.
Choose Anti-Fog Bags
Frozen produce creates condensation. Costco’s anti-fog vacuum bags prevent water droplets and bacteria growth. Three months later, my broccoli still looks green, not yellow.
My son loves blueberry smoothies. Before, thawed berries made them watery. Now, pre-frozen and sealed blueberries make smoothies thick and creamy—his favorite breakfast.
4. Ready-Made Meals (Rotisserie Chicken, Pasta, Stews): Fresh for 5 Days, Perfect for Weeknight Dinners
Costco’s ready-to-eat meals save time—$10 for a rotisserie chicken, or a big tub of pasta salad. The downside? They spoil fast once opened.
Leftover Chicken
Break down into legs and breasts, remove the skin, and seal in 1-person portions using “soft food mode.” Last Sunday’s chicken was still juicy three days later.
Meal Prep for Busy Nights
Cook a large pot of beef stew on the weekend. Portion into 2-person packs, vacuum seal, and refrigerate. On weeknights, just heat in boiling water for 10 minutes. My coworker Emily told me, “This saves me an hour after work. Dinner’s ready instantly.”
3 Must-Know Vacuum Sealer Tips for Beginners
Use the Right Mode for Each Food
Meat = meat mode (strong suction)
Dry goods = gentle mode
Soups/stews = liquid mode
Don’t Overfill Bags
Leave at least 2cm of space at the top, or sealing may fail.
Clean the Machine Regularly
Wipe sealing strips after each use and disinfect weekly. I once had leaks just because oat dust stuck to the strip.
Final Thoughts: Costco + Vacuum Sealer = The Ultimate Money-Saving Combo
Costco bulk shopping is convenient, but waste cancels out savings. Since using a vacuum sealer, I’ve cut my monthly food waste from $50–60 down to about $10 (just the cost of vacuum bags). That’s over $500 saved per year, plus fewer grocery trips.
If you’re a Costco regular, try vacuum sealing these four categories: meats, baking goods, frozen produce, and ready-meals. Already a fan? Share your own tips—how do you store Costco bread or cheese? Let’s make sure every Costco dollar goes further.