RV Camping Vacuum Sealing Hacks: Save Fridge Space & Avoid Spills on Bumpy Roads

Maximize your RV fridge space and prevent messy spills on rough roads with these practical vacuum sealing tips. Perfect for RV enthusiasts looking to travel efficiently and eat fresh.
Introduction
RV camping is one of the most flexible and fun ways to travel. You can explore remote locations, cook your favorite meals, and sleep wherever you want. However, anyone who’s spent time on the road knows the common frustrations: limited fridge space, spills from tipping containers, and food going bad faster than expected.
I’ve been RV camping for over a decade, and I’ve learned that the key to stress-free food storage is vacuum sealing. These simple hacks not only maximize your fridge space but also prevent messy spills and keep your meals fresh for longer.
In this guide, I’ll share everything from choosing the right vacuum sealer and bags, to packing and storing efficiently, to real-world tips that will make your RV life easier and more enjoyable.
Why Vacuum Sealing Matters for RV Camping
Maximize Fridge Space
One of the biggest challenges in an RV is limited storage. Vacuum-sealed foods compress tightly, eliminating the air pockets that take up unnecessary space. By stacking neatly, you can fit more items without overstuffing your fridge.
For example:
A traditional bag of salad greens can take up half a shelf, but vacuum-sealed greens fit in a fraction of the space.
Pre-portioned meals for breakfast, lunch, and dinner can be stacked vertically, freeing room for drinks or fresh produce.
This method is especially useful for longer trips where restocking options are limited.
Prevent Spills and Leaks
Bumpy roads are part of the adventure, but they can wreak havoc on your fridge. Even tightly sealed containers can tip over, spilling liquids like sauces, soups, or juices. Vacuum sealing locks in liquids and prevents leaks entirely.
Tip: For soups or marinades, pre-freeze before vacuum sealing to ensure safety and prevent liquids from getting sucked into the machine.
Extend Freshness
Air exposure accelerates spoilage. Vacuum-sealed foods last significantly longer because oxygen is removed, which slows bacteria growth.
Meat can last 3–5 days longer.
Cheeses and deli meats retain flavor and texture.
Vegetables stay crisp for several days.
For RV campers, this means fewer trips to the grocery store, reduced waste, and more time enjoying the outdoors.
Choosing the Right Vacuum Sealer for RV Use
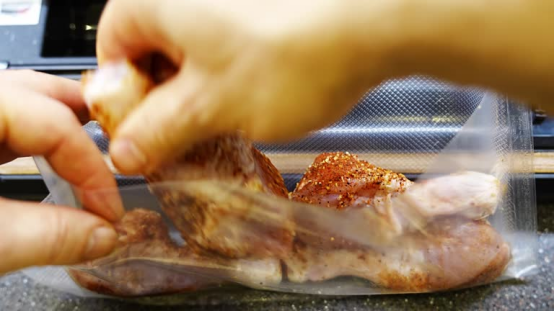
Compact and Portable Machines
RV kitchens are small, so choose a vacuum sealer that is lightweight and easy to store. Some options include:
Handheld sealers that run on batteries or USB power
Compact countertop models with removable trays for liquids
Compatible Bags
Not all bags are created equal. Look for:
BPA-free, food-safe materials
Reusable or recyclable options to reduce waste
Pre-cut bags or roll bags that can be customized for different items
Features to Consider
Moisture detection for wet foods
Seal-only function for delicate items
Built-in cutters for convenience
Packing and Storage Hacks
Portion and Label
Pre-portion meals or snacks before sealing. This makes it easy to grab exactly what you need without rummaging through the fridge. Label each bag with the contents and date for quick identification.
Example: “Chicken Stir Fry – 07/01”
For multi-day trips, organize meals by day to streamline meal prep.
Layer Strategically
Vacuum-sealed items are stackable, but heavier items should go on the bottom to avoid crushing lighter foods like berries or pastries.
Freeze Liquids Before Sealing
If you’re sealing soups, sauces, or broths, pre-freeze them before vacuum sealing. This prevents liquids from being sucked into the machine and keeps your RV fridge organized.
Use Dividers or Storage Bins
Divide your fridge into zones for meat, vegetables, snacks, and drinks. Use bins to keep vacuum-sealed packages upright and prevent shifting during travel.
Real-World Example
Last summer, I packed an RV trip for a family of four. By using these vacuum sealing strategies:
Our fridge stayed organized for 10 days
No spills occurred, even on winding mountain roads
Leftover meals remained fresh for two extra days
Snack and meal prep took only 20 minutes per day
Other RV campers I’ve spoken with also swear by vacuum sealing. One friend mentioned that he never worries about leaking sauces on his bumpy trips anymore, and another noted that he can pack a week’s worth of meat in a fridge that usually feels too small.
Additional Benefits of RV Vacuum Sealing
Reduced Waste: Less spoiled food means less trash and fewer last-minute grocery runs.
Cost Savings: Pre-packed meals prevent impulse purchases or frequent takeout.
Time Efficiency: Quick meal prep allows more time for hiking, sightseeing, and relaxing.
Eco-Friendly: Reusable vacuum bags and reduced food waste help minimize your carbon footprint.
Common Mistakes to Avoid
Overfilling Bags: Leave enough space at the top for a proper seal.
Sealing Hot Foods: Always cool foods before vacuum sealing to prevent condensation and spoilage.
Ignoring Labels: Without labels, it’s easy to forget what’s inside, leading to wasted food.
Using Incompatible Bags: Cheap bags may tear or fail to seal, defeating the purpose.
Conclusion
Vacuum sealing is a simple, effective way to make RV camping smoother and more enjoyable. By saving fridge space, preventing spills, and extending food freshness, these hacks can transform your trips. With a little preparation and the right tools, you’ll spend less time worrying about storage and more time enjoying your adventure.
Call to Action
Ready to simplify your RV life and enjoy stress-free food storage? Invest in a quality vacuum sealer and start packing like a pro. Share your own RV vacuum sealing tips in the comments below and join a community of organized, smart RV campers.