One-Week Prepped Meals for Seniors: Vacuum-Sealed Stews and Porridges, Microwave-Safe, No Spills, Perfect Portions

Since my parents turned 70, daily cooking became a challenge. My dad’s knees hurt and standing for long periods makes him sore; my mom’s eyesight isn’t great, and she’s worried about cutting herself. We tried ordering takeout, but it was either too salty or the food was too tough to chew.
Then I started using a vacuum sealer to prep a week’s meals, and everything changed. On weekends, I spend about 2 hours cooking stews and porridges, portioning them into vacuum bags. Every day, my parents just pop one in the microwave—no spills, no mess, perfect portion sizes, and it tastes just like freshly made.
Cooking Pain Points Every Caregiver Understands
When preparing meals for seniors, convenience, tenderness, and freshness matter most. Previous attempts often failed:
Regular containers for stews: Using ceramic containers for braised pork and potatoes, stored 3 days in the fridge, absorbed a “fridge smell.” Heating often caused spills, leaving a mess in the microwave.
Porridge cooked in bulk: Cooking enough for 3 days made the leftovers thick and clumpy after refrigeration, and repeated heating affected freshness.
Takeout or ready meals: Pre-made senior meals were either too hard (carrots not tender) or too salty, upsetting digestion and costing more.
A neighbor shared her secret: “Vacuum-seal individual portions—it stays fresh and is super convenient.” After trying it, I realized it solved all my problems. Now my parents heat a meal in just 3 minutes, no chopping, no cooking, and it’s comforting to eat.
Why Vacuum-Sealing Works Perfectly for Seniors
Vacuum-sealing isn’t just for long-term storage—it’s ideal for seniors’ needs:
No spills, safe heating: Microwave-safe vacuum bags prevent leaks. Cut a small vent before microwaving to avoid expansion. No messy cleanups or burned hands.
Perfect portion sizes: Each bag is a single meal—e.g., 150g stew, 200g porridge—avoiding waste and repeated reheating.
Locks in freshness and flavor: Vacuum sealing blocks air, keeping meat tender and porridge smooth. Even after a week, braised pork stays soft and millet porridge stays silky.
Example: I made radish and pork rib soup last Saturday, vacuum-sealed into 6 bags. By Thursday, the ribs were still tender, the radish soaked in flavor, and my mom said, “It tastes just like you cooked it today.”
Step-by-Step Guide: 4 Steps to Vacuum-Sealed Meals for Seniors
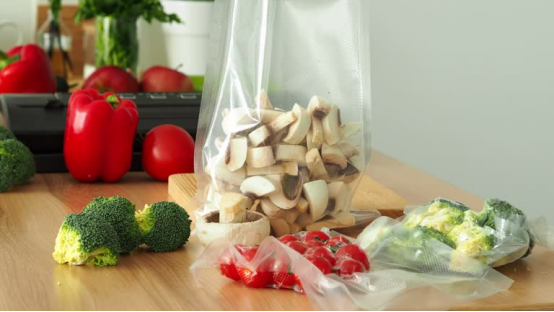
Key focus: soft, low-salt, easy-to-heat.
Step 1: Choose Soft, Easy-to-Chew Ingredients
Stews: Pork belly, ribs, skinless chicken with soft vegetables like radish, potato, winter melon, pumpkin. Cook longer to ensure tenderness.
Porridges: Millet, rice, pumpkin, yam—slightly thinner than usual to maintain texture when reheated. Avoid beans.
Avoid: Hard vegetables (unless finely chopped), spiny fish, or overly oily soups.
Step 2: Cool Completely to Avoid Condensation
Hot food creates condensation, which can lead to mold:
Let stews or porridge cool to room temperature (1–2 hours).
Skim excess oil from porridge to make it easier to digest.
Step 3: Portion Into Bags with Vent Space
Use microwave-safe vacuum bags (18×22cm works for one meal).
Stews: 150–200g per bag, leave ~3cm from top.
Porridges: 200–250g per bag, distribute evenly, avoid the seal.
Label each bag: Meal name + date (e.g., “Radish Pork Rib 10.15”) for easy rotation.
Step 4: Vacuum-Seal on “Wet Mode”
Place the bag in the sealer slot correctly, close the lid.
Select wet mode to slowly remove air without sucking out liquids. Sealer will automatically seal the bag (~20 seconds).
Check the seal—smooth, airtight, no leaks. If needed, reseal.
Storage: Fridge 0–4°C for 7 days, freezer for up to 1 month.
Microwave Safety Tips for Seniors
Cut a small vent: 1cm hole to prevent bag expansion.
Control heating time: Stews 2–3 mins, porridge 1.5–2 mins (adjust by microwave wattage). Let sit 1 min before opening.
Use bowls: Pour meals into shallow bowls to eat comfortably and safely.
Tip: I stick a “heating guide” by the microwave: “Cut vent → Microwave 2 mins → Wait 1 min” for easy reference.
Real Results After 1 Month
After a month of vacuum-sealed meals:
My dad’s knee pain eased; my mom no longer worries about chopping.
Portions are perfect, food soft and smooth, and digestion improved.
I only cook on weekends, saving time and stress.
It takes only 2 hours on the weekend to prep a week’s meals—far easier than daily check-ins.
If you care for elderly loved ones, try vacuum-sealed weekly meals. For tips on ingredient selection, sealer use, or meal prep techniques, leave a comment—we can share ideas to make senior meals easy, healthy, and safe.
I can also share the vacuum sealer model I use—simple operation, wet mode, ideal for prepping senior meals. DM me for pros and cons to help you avoid mistakes.